Step 5: Edit the Header Template
Now that we've changed the color up a bit, let's change the layout. The Base theme has three header templates: Header, No-Header, and Splash. Users can select which header template to use when they create a page.

Let's change the Header template by changing the navigation area so that the Title/Logo and menu are on one line and the title is aligned to the left and the menu is aligned to the right.
- If you're not in the Code Editor, from the Theme tab, click Edit HTML/CSS.
- From the HEADER TYPE directory, select header.html.
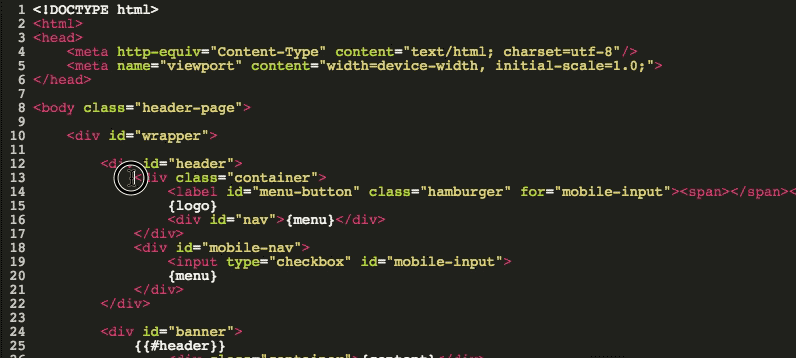
- Find the div whose id="header" and delete everything in that div.
Since we want to have the logo and menu display on one line, we'll need to wrap them in a single div. Add the following code (excluding the header div):
The nav-wrap div is the wrapper div.
The logo and menu are displayed using tags. If you use the {title} tag, only the title displays. If you use the {logo} tag, the user can choose whether to use the title or a logo file that they upload. Let's use the {logo} tag.
The logo and menu are displayed using tags. If you use the {title} tag, only the title displays. If you use the {logo} tag, the user can choose whether to use the title or a logo file that they upload. Let's use the {logo} tag.
Now we need to style the title/logo and menu using the .wsite-logo and .wsite-menu-default classes, respectively. We'll do that in the next step.
What Just Happened?
You edited the header template so that the title and navigation appear on one line. You now need to style the classes in the main.less file.
You edited the header template so that the title and navigation appear on one line. You now need to style the classes in the main.less file.